To turn off Live Photos on an iPhone or iPad, tap the Live Photo button in the Camera app to switch off the feature for the next photo. To make it stay off, open Settings, go to Camera, turn on Preserve Settings, then tap the Live Photo control once to switch it off. Either way takes about ten seconds.
That is the whole trick, and the reason it confuses people is that there are two separate switches that look almost identical. The one in the Camera app resets every time you close the app. The one inside Settings is the permanent fix. Most people tap the first one, see Live Photos reappear later, and assume the setting failed.
Table of Contents
- 1What You Need
- 2Step-by-Step: How to Turn Off Live Photos
- 3Turn Off Live Photos for New Shots
- 4Change the Setting on iPad
- 5Manage Live Photos You Already Took
- 6Common Mistakes
- 7Frequently Asked Questions
- 8Can I turn off Live Photos for just one photo?
- 9How do I permanently turn off Live Photos on my iPhone?
- 10Why do my Live Photos keep turning back on?
- 11What happens to Live Photos I already took after turning the setting off?
- 12Does turning off Live Photos free up storage?
- 13How do I get Live Photos back after turning them off?
- 14Conclusion
What You Need
The steps below work on every iPhone and iPad that runs a current version of iOS or iPadOS, and the paths have been stable across recent releases. Nothing else is required: no third-party app, no Apple account change, no factory reset.
Live Photos arrived with iOS 11 on iPhone 6s and later, so anything newer than that has the feature and the settings to control it. Older hardware simply never had the option in the first place.
One thing worth knowing before you start: turning off Live Photos affects new photos only. Anything already in your library stays a Live Photo until you edit or delete it yourself. That trips up a lot of people who expect the change to be retroactive.
Step-by-Step: How to Turn Off Live Photos
Turn Off Live Photos for New Shots
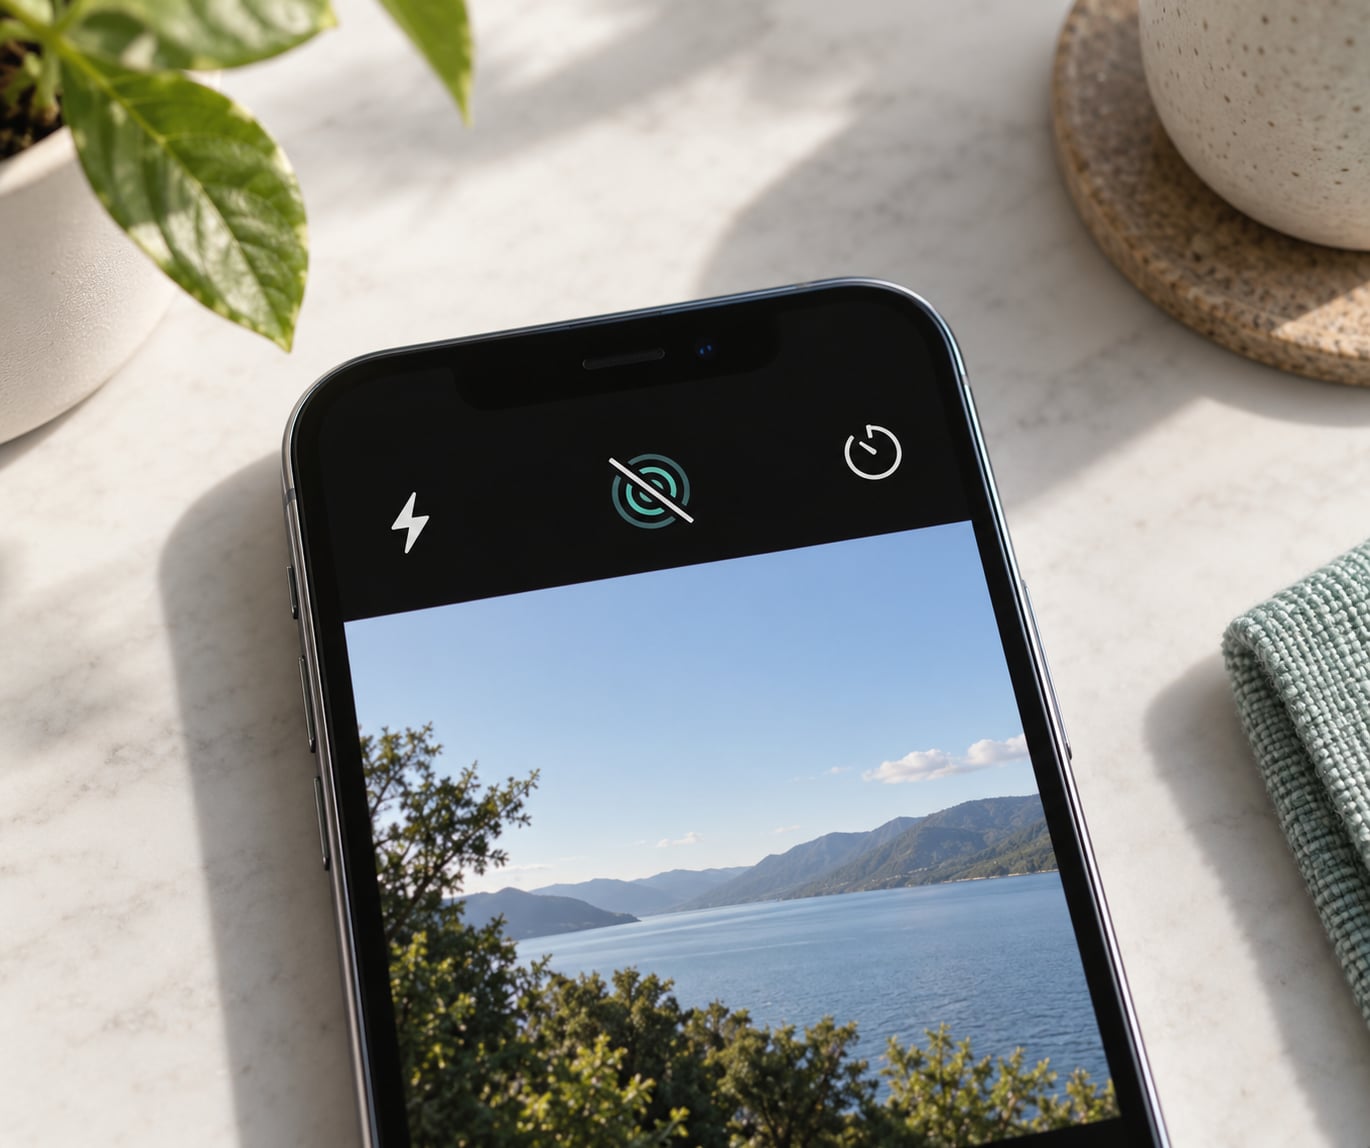
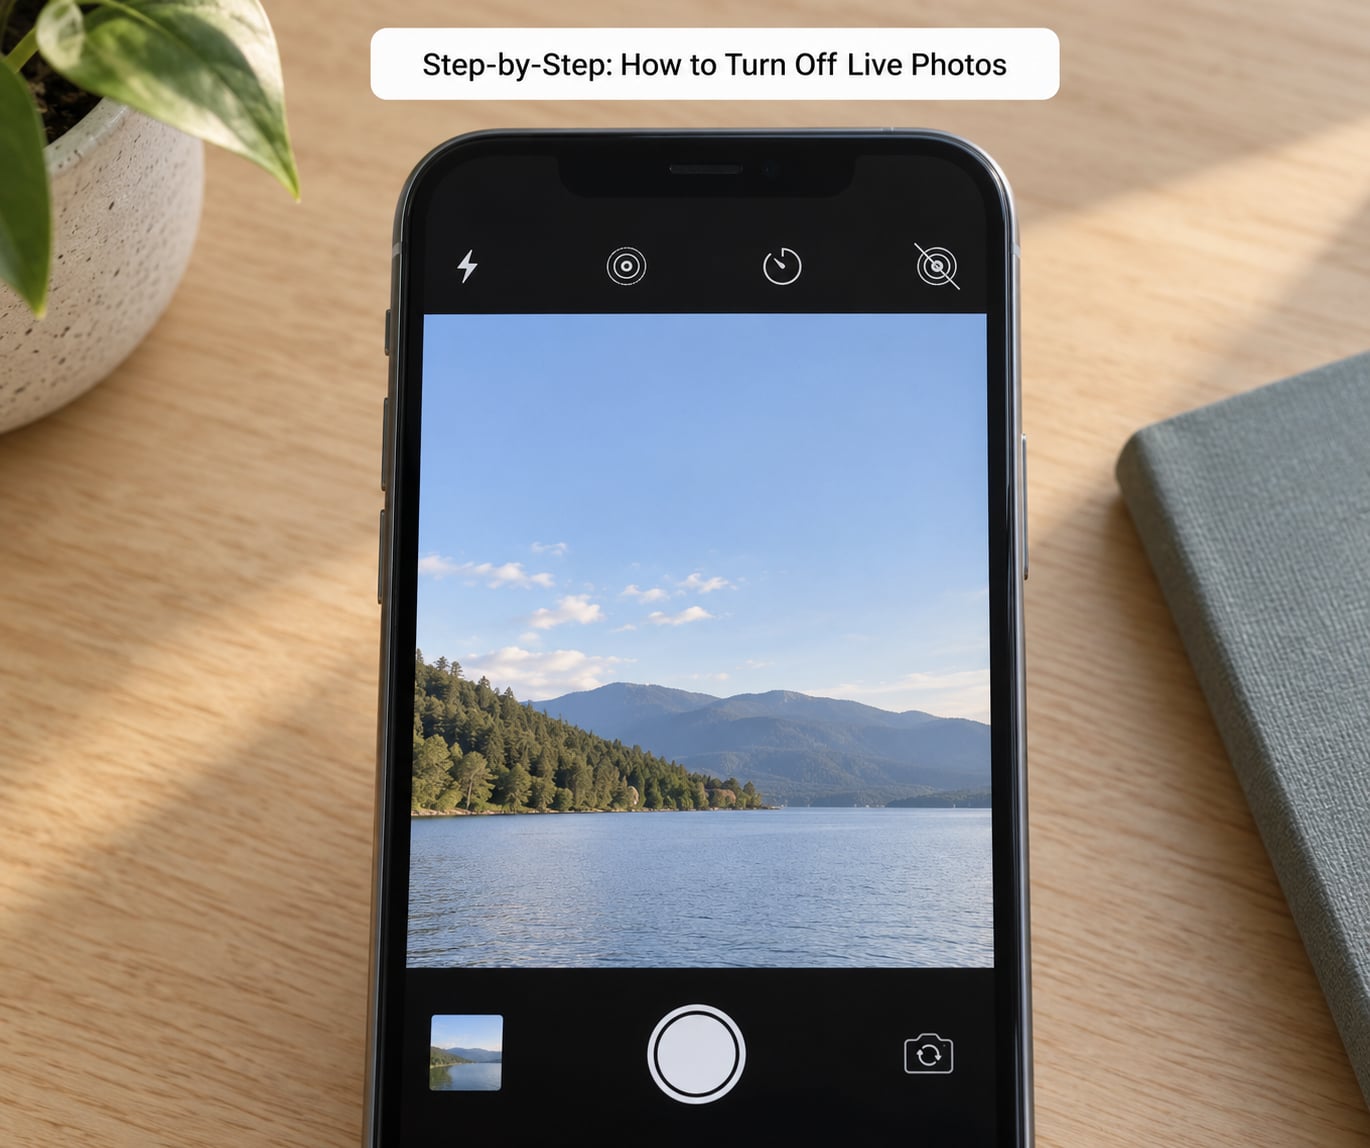
Open the Camera app and switch to Photo mode. Look at the top of the screen, near the flash and timer controls, for the Live Photo button: a set of concentric circles.
Tap it once. The icon changes to the same circles with a diagonal slash through them, and the button goes from yellow to white. That crossed-out state means Live Photos are off for new photos in this session.
The setting resets when you close the Camera app or restart the phone. That is by design, and it is why the fix below exists.
For a permanent change, open the Settings app, scroll down and tap Camera, then tap Preserve Settings and turn it on. Now reopen the Camera app and tap the Live Photo control once so it shows the slash. Because Preserve Settings is on, the camera remembers that choice the next time you open the app.
You will know it worked if the crossed-out icon is still there after you close and reopen the Camera app, and after a restart.
Change the Setting on iPad
iPad follows the same logic, but the control is easier to miss because the Camera toolbar layout differs from the iPhone. The Live Photo button sits in the row of small controls above the shutter button, next to the flash and timer icons, rather than across the top of the viewfinder.
On some iPad models and iPadOS versions the button is not visible by default. Pull down from the top-right of the viewfinder to open the expanded controls panel, where the Live Photo option appears alongside flash and HDR.
The permanent route is identical to iPhone: Settings, then Camera, then Preserve Settings, then switch Live Photo off in the Camera app. iPads with a rear camera follow the same menu layout.
Two interface differences are worth keeping in mind. iPadOS puts Camera settings under Settings, Camera, and the per-shot Live Photo toggle is not exposed in the Control Center the way it is on iPhone, so there is no one-tap shortcut on most tablets.
Manage Live Photos You Already Took
Disabling the setting does nothing to your existing library, which is usually what people want to fix next. Here is how to sort out the photos you already have without losing anything.
To see what is a Live Photo, open Photos and tap the Select button, then choose the Media Types filter at the top of the selection screen and switch it to Live Photos. That view shows only the motion photos, so you can judge whether the collection is worth keeping.
To turn off motion on one item, open it, tap the Live Photo icon in the bottom-left corner to disable Live playback for that photo, then tap Done. The photo itself is untouched; you have only switched off playback.
To keep a still version and discard the motion, open the Live Photo and tap the share button, then choose Save as Photo. That creates a new still image in your library and leaves the original Live Photo alone, so you can compare them before deciding what to delete.
If you do delete the originals, check the Recently Deleted album, which holds items for 30 days before removing them permanently. Photos in Recently Deleted still count toward your storage until that window ends.
Common Mistakes
The Live Photo button is missing entirely. You are probably not in Photo mode. Live Photos only apply to Photo mode, so switch away from Portrait, Night, Cinematic or any other mode and check the toolbar again.
The setting keeps reverting. Preserve Settings is switched off, so the camera resets to its default every session. Turn it on, then tap the Live Photo control to the crossed-out position.
A Focus Mode is resetting your camera. Some users report that switching Focus Modes, or scheduled Focus changes, restores camera preferences to their defaults. If your setting reverts at certain times of day, remove or reschedule the Focus Mode and set the toggle again.
The icon looks different than you expect. Yellow circles mean Live Photos are on. White circles with a diagonal slash mean they are off. That second state is the one you want, and it is easy to misread at a glance.
You expected old photos to convert too. Turning off Live Photos only affects photos taken from that moment on. Existing items need the manual steps above.
Frequently Asked Questions
Can I turn off Live Photos for just one photo?
Yes. Open the Camera app in Photo mode and tap the Live Photo button so it shows a slash through the circles before you press the shutter. That photo is captured as a normal still image, and the setting stays off for the rest of that Camera session. Reopen the Camera app and Live Photos return to their default state.
How do I permanently turn off Live Photos on my iPhone?
Open Settings, tap Camera, tap Preserve Settings and switch it on. Then open the Camera app and tap the Live Photo button until the icon shows a diagonal slash. With Preserve Settings enabled, the camera keeps that choice the next time you open the app, so Live Photos stay off until you turn them back on yourself.
Why do my Live Photos keep turning back on?
Most often the change was made only in the Camera app, which resets to its default every time you close the app. Turning on Preserve Settings under Settings, Camera is what makes the choice stick. A Focus Mode switching on or off at certain times can also restore camera defaults, so check your Focus settings if the toggle keeps reverting.
What happens to Live Photos I already took after turning the setting off?
Nothing changes. Existing Live Photos stay motion photos in your library, because the setting only affects new shots. To deal with them, filter the album by Media Types and choose Live Photos to review them, disable playback on an individual item, or use Save as Photo from the share sheet to keep a still copy before deleting anything.
Does turning off Live Photos free up storage?
Only for photos taken after you turn it off. A Live Photo stores a still image plus a short video clip, so new photos take up more room with the feature enabled. Existing Live Photos keep their size until you convert or delete them, and anything moved to Recently Deleted still uses storage for 30 days.
How do I get Live Photos back after turning them off?
Open the Camera app in Photo mode and tap the Live Photo button so the slash disappears and the circles turn yellow again. You can also open Settings, tap Camera and turn off Preserve Settings if you want the camera to go back to its default behaviour each session. Both changes are reversible at any time.
Conclusion
Start in Settings, tap Camera, turn on Preserve Settings, then open the Camera app and tap the Live Photo control until the icon shows a slash. That is the change that sticks across app restarts and reboots.
Existing Live Photos stay exactly as they are. If you want to sort through them, filter the album by Live Photos in the Select view and decide case by case, keeping a still copy before you delete anything. Updated for 2026.