To change DNS on an iPhone, open Settings, tap Wi-Fi, tap the (i) button next to your connected network, choose Configure DNS, switch from Automatic to Manual, type the server addresses, and tap Save. It takes about thirty seconds, and the whole path sits inside the Wi-Fi settings, not a separate app.
One thing to know before you start: iOS only exposes DNS configuration for Wi-Fi networks. Cellular data keeps using your carrier’s resolver no matter what you change here. If you need something other than your carrier’s DNS on mobile data, that takes a configuration profile, a DNS app, or a router-level change, and I’ll cover those options after the main walkthrough.
The menu names below match iOS 18 and iOS 26 on iPhone and iPad. Nothing in this guide requires a Mac, an Apple ID, or a paid subscription.
If DNS is new to you, here is the short version. When you open a site, your phone turns the name you typed into a number it can dial, and it does that by asking a DNS server, also called a resolver. Your ISP’s or router’s server handles those lookups by default, which means the request can be slow, and the provider gets a log of every site you visit. Pointing your phone at a different resolver changes who answers, which affects page load speed, how much your ISP can see, and whether advertising or malicious domains resolve at all.
One warning on expectations: a new DNS server does not add bandwidth. If your connection is genuinely slow to download, this will not fix it. What it reliably improves is the time between tapping a link and the site starting to appear, plus the filtering you get along the way.
Table of Contents
- 1What You Need
- 2How to Change DNS on an iPhone: Step by Step
- 3Step 1: Open the iPhone Wi-Fi DNS settings
- 4Step 2: Switch from Automatic to Manual
- 5Step 3: Enter your DNS server addresses
- 6Step 4: Save and test the connection
- 7Step 5: Restore Automatic DNS
- 8Common mistakes when changing DNS on an iPhone
- 9Tips for a reliable DNS change
- 10Frequently Asked Questions
- 11Does the iPhone have DNS settings, and is it safe to change them?
- 12Why can I not change DNS on cellular data?
- 13How do I flush the DNS cache on my iPhone?
- 14Is 8.8.8.8 or 1.1.1.1 better for an iPhone?
- 15Will a filtering DNS break my apps or games?
- 16Conclusion
What You Need
Three things: an iPhone or iPad on a current iOS version, a Wi-Fi network you are connected to right now, and the primary and secondary DNS addresses from the provider you want to use. That last part trips people up most often, because the provider’s website shows four addresses and the iPhone screen takes two at a time.
Here are the complete public sets, so you can read them off the page without leaving it:
| Provider | Primary IPv4 | Secondary IPv4 | IPv6 | Best for |
|---|---|---|---|---|
| Cloudflare | 1.1.1.1 | 1.0.0.1 | 2606:4700:4700::1111 and ::1001 | Speed and privacy with no logging policy |
| 8.8.8.8 | 8.8.4.4 | 2001:4860:4860::8888 and ::8844 | Raw speed and reach | |
| Quad9 | 9.9.9.9 | 149.112.112.112 | 2620:fe::fe and 2620:fe::9 | Malware and phishing blocking built in |
| OpenDNS | 208.67.222.222 | 208.67.220.220 | Not offered | Long track record, family filtering variant |
| AdGuard | 94.140.14.14 | 94.140.15.15 | 2a10:50c0::ad1:ff and ::ad2:ff | Ad and tracker blocking at the network level |
| NextDNS | Provided after you create a free profile | Provided after you create a free profile | Provided after you create a free profile | Filtering rules you control from a dashboard |
IPv6 addresses are optional on the iPhone. If your network is IPv4-only, leaving them out is fine and avoids blank connection errors. Entering them on an IPv6 network is what stops the phone quietly falling back to your router’s resolver for half your lookups.
Two more things worth knowing. The setting belongs to one Wi-Fi network only, so it does not follow you to a cafe or your phone’s hotspot. And the change survives a restart, so you won’t have to redo it tomorrow.
How to Change DNS on an iPhone: Step by Step
Step 1: Open the iPhone Wi-Fi DNS settings
DNS settings are reached from the network row itself, so start at Settings > Wi-Fi. You will see your connected network at the top with a blue checkmark, and a blue (i) button on the right-hand side of that row. Tap the (i), not the network name, or you will just rejoin the network and land back where you started.
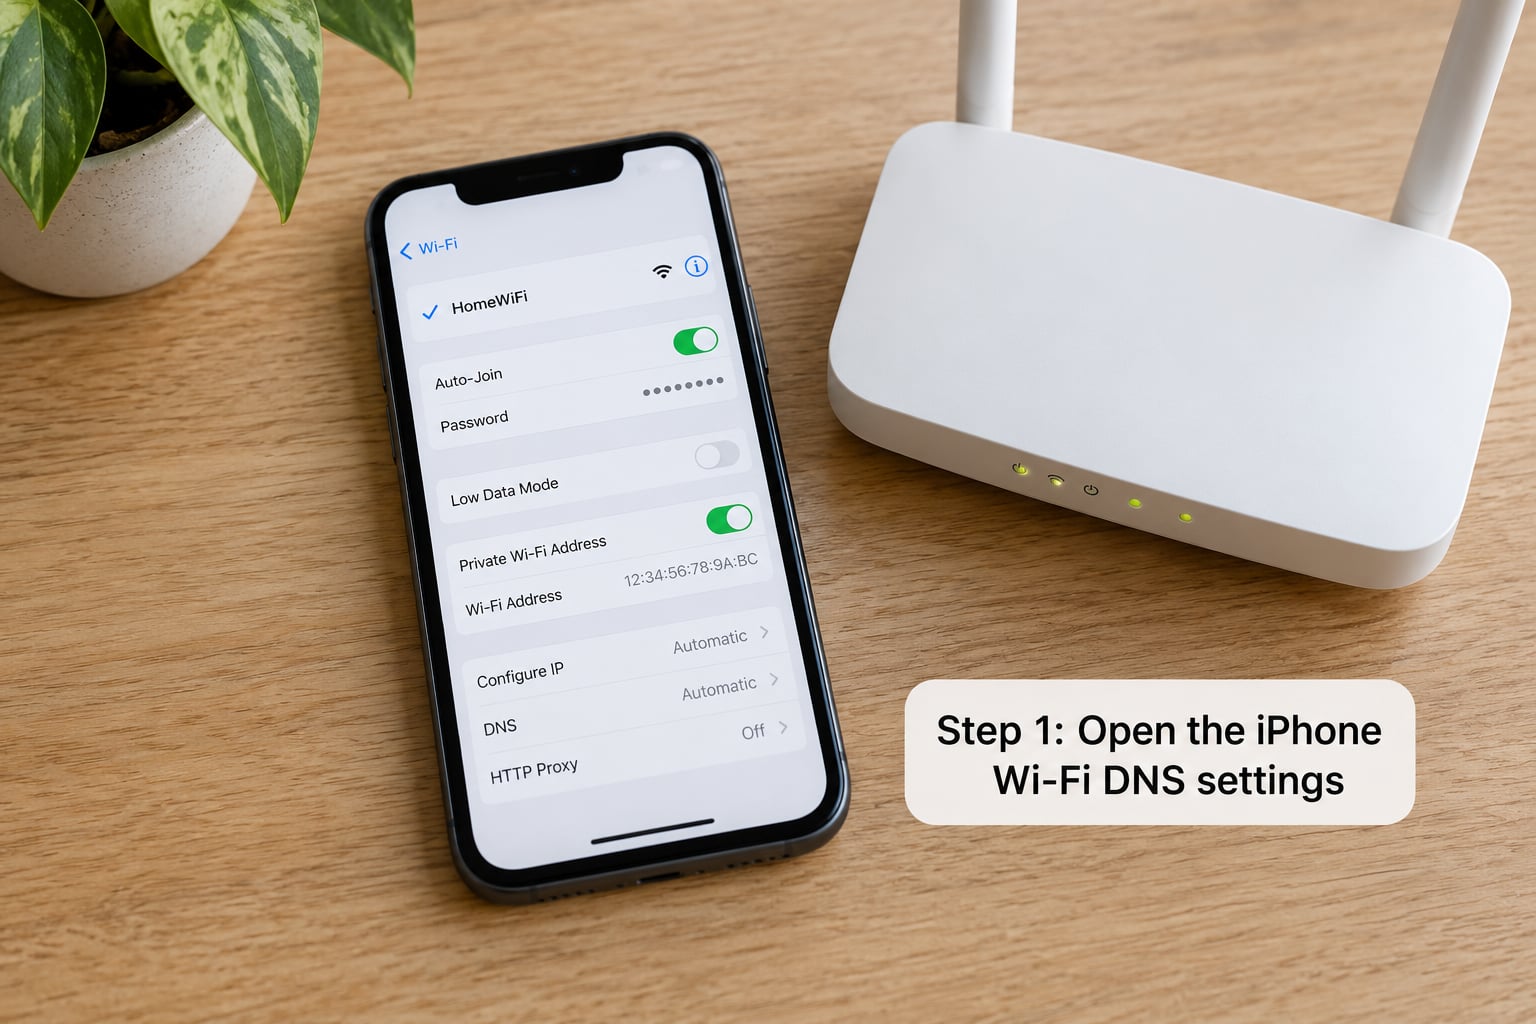
The screen that opens shows the network name, IP address, router, and a Configure DNS button near the bottom. If you do not see Configure DNS, tap the network row and check that you are on the connected network, since iOS hides some options on networks it has not joined.
Step 2: Switch from Automatic to Manual
Tap Configure DNS and you get two choices: Automatic and Manual. Automatic is where your router hands down its own DNS addresses over DHCP, and that is the setting you are replacing. Tap Manual and iOS immediately populates the list with those DHCP-assigned addresses, which you need to delete next.
Do not skip the deletion step. Those addresses were assigned by the router, and leaving them at the top of the list means your phone still queries them first, so your new provider never gets used. Swipe left on each row and tap Delete until the list is empty.
Step 3: Enter your DNS server addresses
With the list empty, tap Add Server and type the primary address exactly as written, digits and dots, no spaces and no extra zeros. Tap Add Server again for the secondary address. Order matters: the first entry is the one queried, and the second is the fallback used when the first fails to answer, so putting the blocking provider second and the fast plain resolver first is a reasonable split.
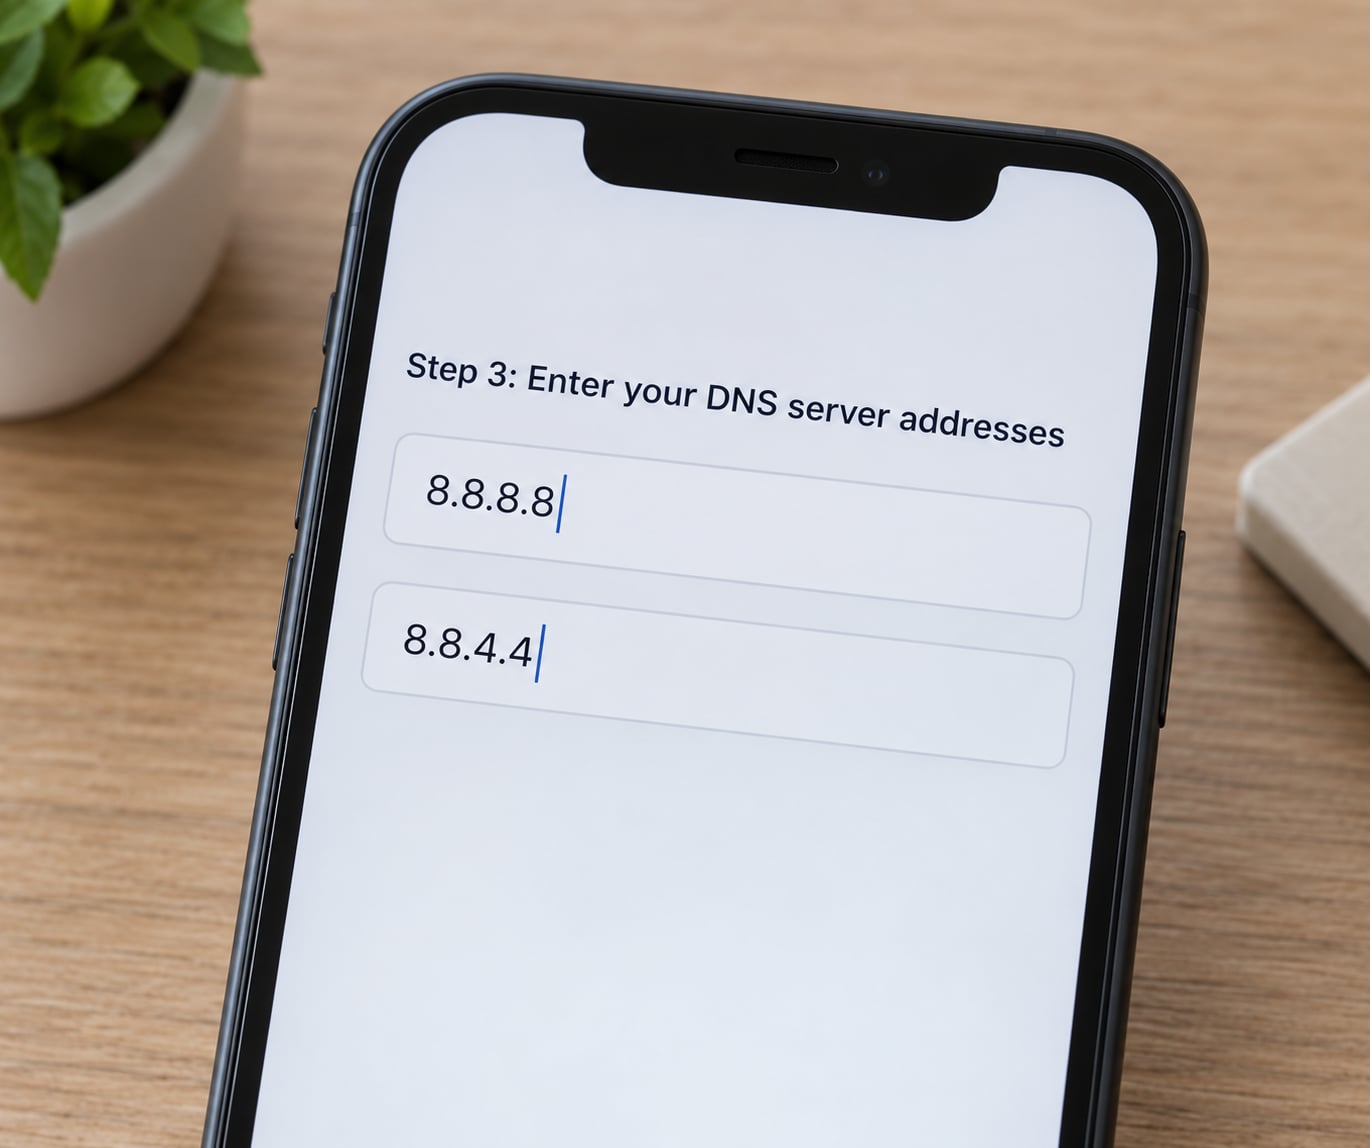
Tap Save, then tap Save again on the network screen to commit the change. A single tap on the Wi-Fi toggle is not needed, but leaving the network and rejoining it is the most reliable way to make sure the phone drops its old resolver. If nothing looks wrong after saving, you can skip that and simply toggle Airplane Mode for ten seconds instead.
Step 4: Save and test the connection
Once saved, load any page to confirm you still have a working connection. If the page loads, the DNS change took. If pages hang on a blank screen, something in the addresses was mistyped, so go back and compare character by character.
To see the change on the network screen, tap the (i) button again and look at the IP Address field. Your phone should have picked up a network address and a router, which tells you DHCP still worked and the problem is not the Wi-Fi itself. Now visit the provider’s own DNS test page in Safari, which reports the resolver currently answering your queries, and you can confirm the switch rather than assume it.
If a site still loads an old version or an old blocked page, your phone is holding cached results. There is no flush command in iOS Settings, so toggle Airplane Mode on and off, or restart the phone, which empties the cache and forces fresh lookups. That same trick matters when you edit your filtering rules on a NextDNS or AdGuard dashboard and the phone keeps behaving as if nothing changed.
Step 5: Restore Automatic DNS
To undo everything, reopen the network, tap the (i) button, tap Configure DNS, and choose Automatic. The manual addresses you added are cleared as part of that switch, so there is nothing else to delete. If the network now behaves oddly and you cannot load a single page, restoring Automatic is the fastest way back to a working phone.
It helps to write down what you changed before you change it. If a resolver stops answering months from now, you will want the old automatic setting and the address you had before as a fallback rather than trying to remember them.
Common mistakes when changing DNS on an iPhone
- Leaving the DHCP-assigned entries in place. The phone keeps using the router’s servers and your change appears to do nothing. Delete every entry before adding new ones.
- Typing addresses with spaces or a trailing period. iOS rejects the save or accepts it and then fails to resolve. Type plain digits and dots.
- Saving before re-joining the network. The old resolver can stay cached in the current session. Toggle the Wi-Fi switch off and on after saving.
- Changing the wrong network. The (i) button edits one network only. Your phone may drop back to another network automatically, and that network still has its own DNS setting.
- Expecting it to apply to cellular data. iOS has no Settings switch for mobile DNS, so the change stays on Wi-Fi.
- Picking a provider your network blocks. Some school and workplace networks filter or intercept unfamiliar resolvers. If everything stops loading, check with your administrator before assuming the phone is broken.
Tips for a reliable DNS change
Change one provider at a time and give it a day. If you switch providers every hour you will never know which one caused the difference, and you will have no clean answer when something breaks.
Set the same addresses on your router instead if you want the whole household covered. Router-level DNS is set once and every device inherits it, phones, TVs, and consoles included, which removes the per-network problem entirely. A device-level setting like this is more useful when you travel or use more than one network, because the router only covers the network it sits on.
Watch for two features that interact with DNS. iCloud Private Relay routes Safari traffic through Apple’s own proxy when it is enabled, which can override or bypass your chosen resolver. A VPN does the same thing by design, routing all traffic, DNS included, through its server. Turn either off briefly if you want to confirm your resolver is really being used.
If you want faster access to the DNS screen, a Shortcuts action that opens the Wi-Fi settings URL saves several taps each time. It is a small convenience, and it comes in handy if you expect to switch between providers often.
One last thing about filtering resolvers. Ad blocking and malware blocking happen by refusing to resolve advertising and malicious domains, and the occasional app depends on one of those domains for a legitimate reason. Banking, in-app purchase, and some game services are the usual casualties, and a game that will not load after a DNS change is a classic symptom. Allowlisting the specific service in your provider’s dashboard fixes it without giving up the rest of the filtering.
Frequently Asked Questions
Does the iPhone have DNS settings, and is it safe to change them?
Yes, iOS has DNS settings and changing them is safe. They live under Settings, Wi-Fi, then the (i) button on your connected network, followed by Configure DNS. You are only telling your phone which server to ask for name lookups, and any change can be reversed by tapping back to Automatic. The addresses themselves are just numbers your phone dials, with nothing installed on the device.
Why can I not change DNS on cellular data?
Because iOS does not expose a DNS setting for the mobile network. The Configure DNS screen belongs to a specific Wi-Fi network, and cellular data uses DNS servers assigned by your carrier. To change DNS on mobile data you need a DNS settings configuration profile, a DNS app that installs one, or a change on the router if your phone uses it for mobile traffic.
How do I flush the DNS cache on my iPhone?
iOS has no built-in flush command. Turn Airplane Mode on, wait about ten seconds, then turn it off, which drops the connection and forces fresh lookups, or restart the phone for the same effect. This matters most when you change filtering rules on a provider’s dashboard and the phone keeps using old results. Rejoining the Wi-Fi network has a similar effect.
Is 8.8.8.8 or 1.1.1.1 better for an iPhone?
Both work well and the difference is usually small. Cloudflare’s 1.1.1.1 resolves quickly in most regions and publishes a no-logging policy, so it is a sensible default for privacy. Google’s 8.8.8.8 has broad reach and tends to be the fastest option outside Europe and North America. Neither blocks ads or malware, so pick Quad9 or AdGuard instead if that is what you want.
Will a filtering DNS break my apps or games?
It can, and usually through a domain the app needs for something legitimate. Banking apps, in-app purchases, and some games fail to load when an ad-blocking resolver refuses their domains. The fix is to allowlist that service in your provider’s dashboard rather than abandoning filtering. If you would rather not manage exceptions, use a plain resolver such as Cloudflare or Google instead.
Conclusion
To change DNS on iPhone, open the active Wi-Fi network from Settings, tap Configure DNS, choose Manual, delete the addresses your router supplied, add your provider’s primary and secondary addresses in that order, and save. Then toggle the Wi-Fi switch or Airplane Mode to force the phone to re-resolve, and check a page loads.
Keep Automatic DNS one tap away the whole time, and remember the setting is per-network and Wi-Fi only. That combination means any mistake is a thirty-second rollback rather than a trip to a repair shop.