A smart home scene is one named control in the Apple Home app that changes several accessories at the same time. To create one you tap the add button, choose Add Scene, give it a name, then set the exact state you want for every light, plug, blind, lock or thermostat it should touch. On iPhone, iPad or Mac the whole job takes about three minutes, and no coding is involved.
That is the direct answer. The button is rarely the hard part. What slows people down is deciding which accessories belong in the scene and what each one should end up doing, so write that down before you open the app.
One constraint is worth knowing up front, because it catches almost everyone: you can build and run scenes straight from your iPhone, but automations that need to fire while you are away from home require a HomePod or an Apple TV acting as the hub. iPhones and iPads no longer work as HomeKit hubs.
Table of Contents
- 1What You Need
- 2What the words actually mean
- 3Step-by-Step
- 4Step 1: Open the Home App and Check Your Accessories
- 5Step 2: Create the Smart Home Scene
- 6Step 3: Name and Save the Scene
- 7Step 4: Run and Test the Scene
- 8Step 5: Automate the Scene When Needed
- 9Common Mistakes
- 10Frequently Asked Questions
- 11Can I create a smart home scene with just an iPhone?
- 12Which accessories can I add to an Apple Home scene?
- 13How do I run a smart home scene with Siri?
- 14What is the difference between a scene and an automation in the Home app?
- 15Why are some accessories missing from my Home app scene?
- 16How do I fix a smart home scene that will not activate?
- 17Conclusion
What You Need
You need six things, and you already have most of them.
- An Apple device running a current version of iOS, iPadOS or macOS, signed in to the same Apple Account as the rest of your household.
- The Home app, which ships built in on every Apple device. If you have never opened it, you get a default home called My Home the first time you do.
- A hub: a HomePod, a HomePod mini or an Apple TV. You only need one for the whole house, and it can double as your speaker or TV.
- Accessories already added to Home. You cannot add a device to a scene from the manufacturer’s own app and expect it to appear here; it has to be in Home first.
- A Thread border router if any of your accessories use Thread or Matter-over-Thread. The HomePod mini and Apple TV 4K both act as one, older HomePods and Apple TVs do not.
- A plan for the scene: the name, the list of accessories, and the state each one should end up in.
That last item is the whole trick. For a Movie Night scene, for example, you want a written list like this: living room lights on at 20 percent and warm, ceiling light off, TV plug on, blinds down to zero percent, thermostat set to 21C. Writing it first means the build takes two minutes instead of fifteen.
What the words actually mean
Before the steps, here is the vocabulary that trips people up. Apple, Google and Amazon use different words for the same job, and Home Assistant has three separate concepts. This is the part forums get argued about most, so it is worth two minutes.
| What it does | Apple Home | Google Home | Alexa | Home Assistant |
|---|---|---|---|---|
| One tap or one voice command sets several devices | Scene | Routine | Routine | Scene |
| Runs by itself when a time, sensor or device event happens | Automation | Routine | Routine | Automation |
| Custom logic you write yourself | Not offered | Not offered | Not offered | Script |
One trap in the Alexa column. Older versions of the Alexa app had a feature literally called scenes, which captured a snapshot of your devices. Routines replaced that, and the name caused plenty of confusion in the Amazon forums. If someone tells you to create an Alexa scene, they almost certainly mean a routine.
Step-by-Step
Every platform works the same way underneath, so here is the whole process in six lines before the detail.
- Open the Home app and confirm your accessories show as reachable, not No Response.
- Tap the add button, choose Add Scene, then pick Custom.
- Name the scene and give it an icon and colour.
- Add each accessory and set its exact state: on or off, brightness, colour, temperature, lock, blind position.
- Save, then tap the scene’s play button and walk through the house checking every device.
- Optional: add an automation that runs the scene at a time, on a sensor, or when someone arrives.
The rest of this section expands each of those for Apple devices, with the menu paths spelled out.
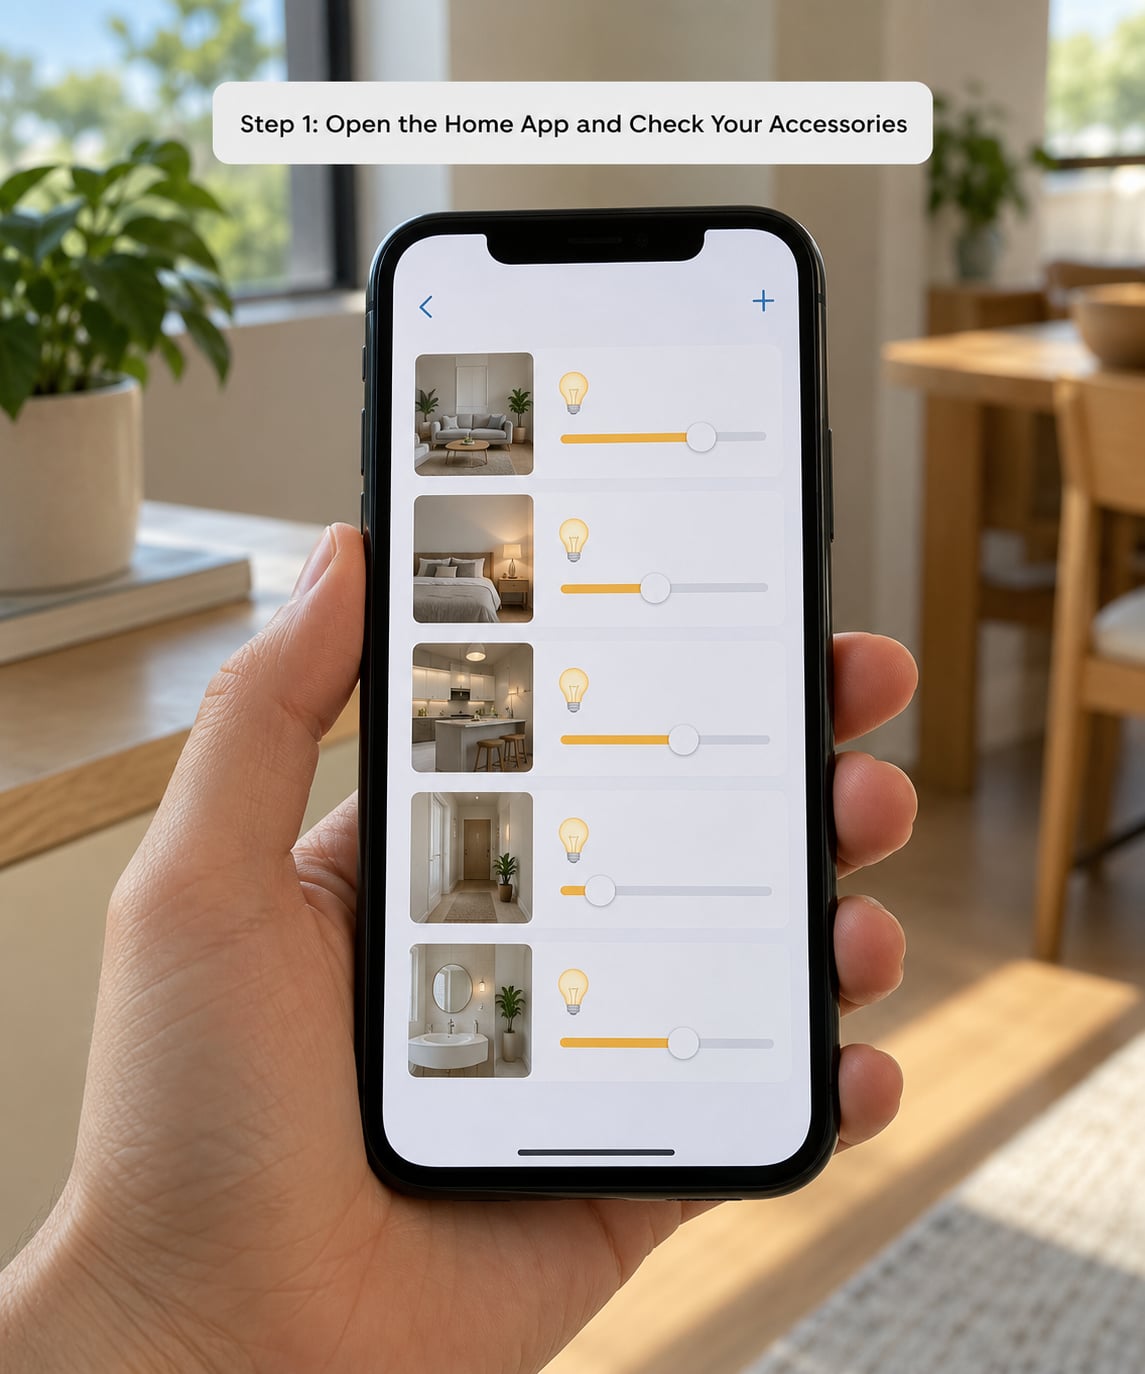
Step 1: Open the Home App and Check Your Accessories
Open Home on your iPhone or iPad. If you have more than one home, such as a second property or a shared family home, tap the home name in the top bar and pick the right one before you do anything else, because everything you build attaches to whichever home is currently selected.
On Mac, the Home app opens with a sidebar listing your homes. Pick yours there instead. The rest of the layout is the same: rooms on one side, accessories and scene cards on the other.
Now walk the rooms. Any accessory showing No Response is a problem worth fixing before you build, because a scene cannot set a device that is offline. The usual causes are the hub being powered off or disconnected, the accessory losing its Wi-Fi, or a Thread device added before you had a HomePod mini or Apple TV 4K providing the network.
Check rooms too. A scene is easier to build, and far easier to edit later, when your lights are assigned to Living Room rather than floating outside any room group.
Step 2: Create the Smart Home Scene
Tap the + button in the top corner of the Home app, then tap Add Scene. You get a small set of suggested scenes, such as Home, Away, Good Night and Return Home, which are a decent starting point if one of them is close to what you want.
For anything custom, tap Custom. That gives you a blank scene you fill in yourself, which is what you want for a Movie Night or a Focus scene.
On Mac the + sits in the Home app toolbar, and the flow after that is identical: Add Scene, then Custom.
Now the important part. Your new scene lists every accessory in the house, grouped by room. Tap one and choose its state:
- Lights get On or Off, then a brightness slider and colour controls, including a cool-to-warm temperature slider.
- Smart plugs get On or Off, which is how you control a TV, a lamp or a coffee machine.
- Blinds and shades get a position, either as a named preset or as a percentage.
- Locks get Locked or Unlocked. Be deliberate about which scenes you allow that.
- Thermostats get a target temperature, plus heat or cool mode.
- Speakers can play, pause, set volume and resume playback.
Cameras and doorbells generally cannot be added to a scene, since a snapshot of a camera in a group command makes little sense.
Anything you do not set keeps its current state when the scene runs. That is a genuine advantage over the automation route, where an unlisted device is simply untouched too, but with a scene you can see the whole picture in one screen before you save.
Step 3: Name and Save the Scene
Give it a short, memorable name. This matters more than it looks, because that name is exactly what Siri listens for, and short two-word names are what assistants parse most reliably. Movie Night, Good Morning and Bedtime all work well. Movie Time 2 does not.
Avoid two traps: names that overlap with a room you already have, and names so similar to another scene that the assistant picks the wrong one. If you have Movie Night and Movie Evening, expect to get the wrong one and blame the app.
Pick an icon and a colour that fit the moment. Warm orange for Movie Night, red for Away, blue for Bedtime. You are choosing this for yourself as much as for Siri, since you will be scanning the Home view for it.
Save with the Done or Save button. The scene appears as a card in your home view automatically, no extra step needed. Long press the card, or tap Edit, to change the icon, colour or name later.
Two useful follow-ups: tap the star or heart to favourite the scene so it stays at the top, and note that a scene also shows on a room screen whenever it controls at least one accessory in that room. So a scene covering your living room lights appears on the Living Room tab as well as on the main home view.
Step 4: Run and Test the Scene
Tap the play button on the scene card. Every accessory you set should change within a second or two. Walk the house and confirm each one, especially locks and blinds, which are the two people most often forget to check.
Then test the second route, because it is the one you will actually use. Say Hey Siri, start Movie Night. If Siri reports that it cannot find the scene, the name is the problem, so rename it to something shorter and try again. Saying the name on its own also works once the assistant has learned your phrasing.
The same scene is available on Apple Watch through the Home app, which makes it genuinely useful from the sofa or the hallway when your hands are full.
Worth knowing how turning a scene off behaves: in the Home app, deactivating a running scene switches off the accessories it switched on and leaves everything else alone. It does not return your house to some remembered previous state. If you want that, you write a second scene by hand and put those states in it yourself.
Step 5: Automate the Scene When Needed
A scene only runs when you ask it to. To have it run on its own, go to the Automation tab in the Home app and tap +.
You pick a trigger first. The options are a time of day, people arriving or leaving, another accessory being controlled, a sensor detecting motion or a door opening, or a shortcut you run from the Shortcuts app.
Then set optional conditions to narrow when it fires. For instance, a trigger of people leaving plus a condition of it being after dark means one scene runs at night and another in daylight.
Finally, add the action. Your saved scenes appear in the list, so pick the one you just built instead of rebuilding the same device list as individual actions. This is the pattern most people land on eventually: build the scene once, then reference it from as many automations as you like. Change the scene later and every automation that uses it updates at once.
This is also the clearest answer to scene versus automation. A scene is a named state you trigger. An automation is the event that triggers it. One scene, many automations, no duplication.
Platform differences are small but real. Trigger types differ slightly between iOS, iPadOS and macOS, and the Mac app is a little slower to pick up new automation options than the phone does. Check the option you need exists on the device you are building from before you commit to a plan around it.
And remember the hub. Automations that need to run while everyone is out, such as locking up on the last departure, need a HomePod or Apple TV awake and on your network. An iPhone-only setup will happily create the automation and then quietly not run it.
Common Mistakes
Almost every scene problem is one of these six.
- An accessory is missing from the scene list. The device is not in Home yet, it lives in a different home, or it is a non-HomeKit product that never paired. Add it in the Home app first; if it will not pair and the maker advertises Matter, that is usually a Thread border router problem rather than a scene problem.
- One accessory says No Response when the scene runs. The rest of the scene still works. Power cycle that device, check it is on the same network as the hub, and confirm your hub is online in the Home app settings.
- The scene does nothing when tapped. Check the play button actually registered and that you are in the correct home. Reopen the scene and confirm each accessory still has a state set, since a reset can clear them.
- An automation never fires. Confirm the hub is awake, the conditions can actually be true at the time you expect, and the automation switch in the list is on. Time-of-day triggers set for a minute you have already passed will run the next day, which catches people out constantly.
- Siri does not hear the scene name. Shorten the name, remove anything that sounds like a room or another scene, and use the phrase start with the name. If the assistant answers a different device, the two scene names are probably too similar.
- The scene changes something you did not expect. Open the scene and read the accessory list from top to bottom. An accessory grouped in the wrong room, or added to a room you did not intend, is usually the cause.
Two habits keep scenes manageable. Favourite the two or three you use daily and let the rest sit in the list unstarred, and try to stay under about eight scenes per home, because past that the voice assistant starts picking the wrong one and you stop trusting it.
Frequently Asked Questions
Can I create a smart home scene with just an iPhone?
Yes. Building, editing and running scenes all work from the Home app on an iPhone with no extra hardware. You only need a HomePod or an Apple TV if you want automations to run while nobody is home, or if your accessories use Thread, since those models provide the border router network.
Which accessories can I add to an Apple Home scene?
Anything already added to the Home app: lights with brightness and colour control, smart plugs, blinds and shades, locks, thermostats, fans, speakers, and water or leak sensors for their state. Cameras are usually excluded. Each accessory only accepts the controls it actually supports, so a plug gets on and off while a light also gets brightness and colour.
How do I run a smart home scene with Siri?
Say Hey Siri, then the scene name, such as start Movie Night. Saying the name on its own often works too. Siri needs a HomePod, an Apple TV, or your iPhone itself nearby to handle the request, and the scene must be in the home you are currently asking about, so check the home name if the assistant cannot find it.
What is the difference between a scene and an automation in the Home app?
A scene is a saved set of device states that runs when you ask for it by tapping or voice. An automation is the trigger that runs something automatically, such as a time, a sensor detection, or someone arriving. You can build one scene and reference it from many automations, which is easier to maintain than repeating the same device list in each one.
Why are some accessories missing from my Home app scene?
Most often the accessory was added in the manufacturer’s own app rather than in Home, so it has never reached Apple. It can also be assigned to a different home, removed from shared access, or added to a second home you have not selected at the top of the app. Thread devices added before you owned a HomePod mini or Apple TV 4K are a frequent cause too.
How do I fix a smart home scene that will not activate?
Tap the scene once manually and look for the accessory showing No Response, since the rest of the scene will still run around it. Check the hub is powered on and online, confirm you are in the right home, and reopen the scene to verify each device still has a state set. For an automation that never fires, check the conditions can be true and the time has not already passed.
Conclusion
The fastest route to a working scene is a small one. Pick four accessories you use every evening, write down the exact state you want for each, then open Home, tap +, choose Add Scene and Custom, name it, set the four states and save. Two minutes of building, then tap the play button and walk the house to confirm.
Once that one scene behaves, build the second one for bedtime and link each to an automation with a time or a sensor trigger. Keep the hub powered on, keep names short and distinct, and you will have the kind of smart home people assume took a professional to set up.