To clean an Apple Watch band safely, take the band off the watch first, then match the method to the material. Wipe silicone, nylon and stainless steel with a soft lint-free cloth and mild dish soap and water, spot-treat stubborn grime with 70% isopropyl alcohol, and keep leather barely damp instead. Air-dry everything fully before you wear it again.
It takes about ten minutes and no special equipment. The whole job rests on one decision: which material you are holding. A silicone Sport Band can be rinsed under a tap. A leather Heritage band cannot. Get that wrong and you can harden the silicone, stain the leather or work loose the glue holding a woven band together.
There is a reason this comes up so often in Apple Discussions and r/AppleWatch threads. A band sits against damp skin for hours at a stretch, and the gap underneath traps sweat, skin cells and whatever you touched two hours ago. A band that is never cleaned is the reason your wrist smells by mid-afternoon, and a regular wash is the fix. Most of the confusion in those threads is material confusion: people cleaning a leather band the way they would clean a silicone one, or scrubbing either with something abrasive.
Table of Contents
- 1What You Need
- 2Step-by-Step
- 3Step 1: Identify the Band Material and Remove the Watch
- 4Step 2: Prepare the Band and Cleaning Solution
- 5Step 3: Clean the Band Gently
- 6Step 4: Dry and Check the Band
- 7Step 5: Reattach the Band and Maintain It
- 8Common Mistakes
- 9Frequently Asked Questions
- 10Can I wash my Apple Watch band under running water?
- 11How often should I clean an Apple Watch band?
- 12Can I use alcohol wipes or bleach on an Apple Watch band?
- 13How do I get odor out of an Apple Watch band?
- 14Can I clean the Apple Watch itself with soap and water?
- 15What should I do if a band irritates my skin or looks damaged?
- 16How to Clean Apple Watch Band Safely: Start With the Material
What You Need
Everything on this list is cheap and most of it is already in your kitchen. Keep it in one small tray next to the sink so the routine actually happens.
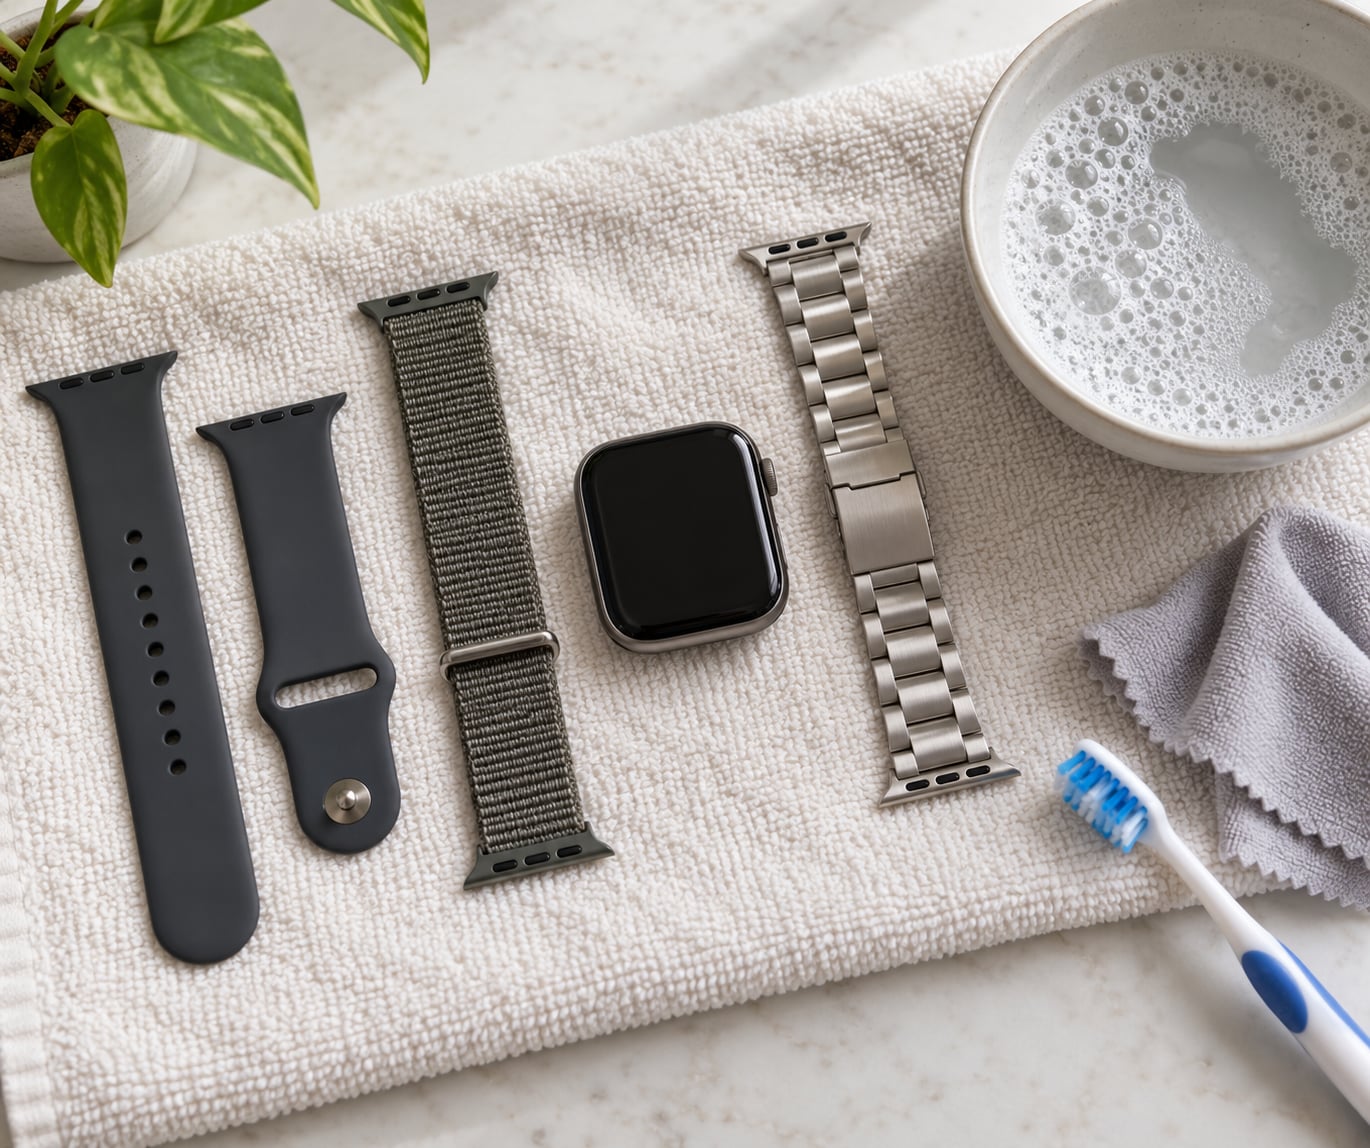
- A soft, lint-free, nonabrasive cloth. A microfiber cloth is ideal. A clean cotton handkerchief works in a pinch. Anything that sheds fibers or has a rough weave is out.
- Mild dish soap or mild hypoallergenic hand soap. Fragrance-free is better. You need enough to make the water feel slightly slippery, not a foamy bath.
- A bowl of lukewarm water. Not hot. Heat is what cracks leather and warps a band over time.
- 70% isopropyl alcohol for silicone, nylon and stainless steel only. The 70% concentration matters: higher percentages evaporate too fast to disinfect and can cloud plastics, lower ones are too slow to dry.
- A soft-bristled toothbrush. An old one, kept for cleaning rather than teeth. This is the tool that gets grime out of band holes and under a buckle.
- Cotton swabs. For the crevice where the band meets the connector and the inside of the clasp.
- A soft towel. For laying the band out while it dries, and for keeping water off your counter.
Now the list of things to leave in the cupboard. Bleach and ammonia-based household cleaners discolor and weaken silicone. Acetone and nail polish remover strip finishes and can craze the plastic connectors. Toothpaste and Magic Eraser are abrasives; Magic Eraser is essentially very fine sandpaper, and it is a recurring suggestion in forum threads that I would skip, because it leaves micro-scratches that hold more grime than the surface started with.
One rule covers all of it: if a product is meant to clean a surface tougher than a watch band, it is too harsh. The band is the part of the watch that actually touches grime, and it is also the part that gets replaced most often, so there is no upside to being aggressive.
Whatever method you pick, the watch itself comes off first. The case has a speaker grille, a crown and a band release mechanism that water and solvents should never reach, and the connector channel on the case holds grime that you will clean separately with a dry cloth.
Step-by-Step
Step 1: Identify the Band Material and Remove the Watch
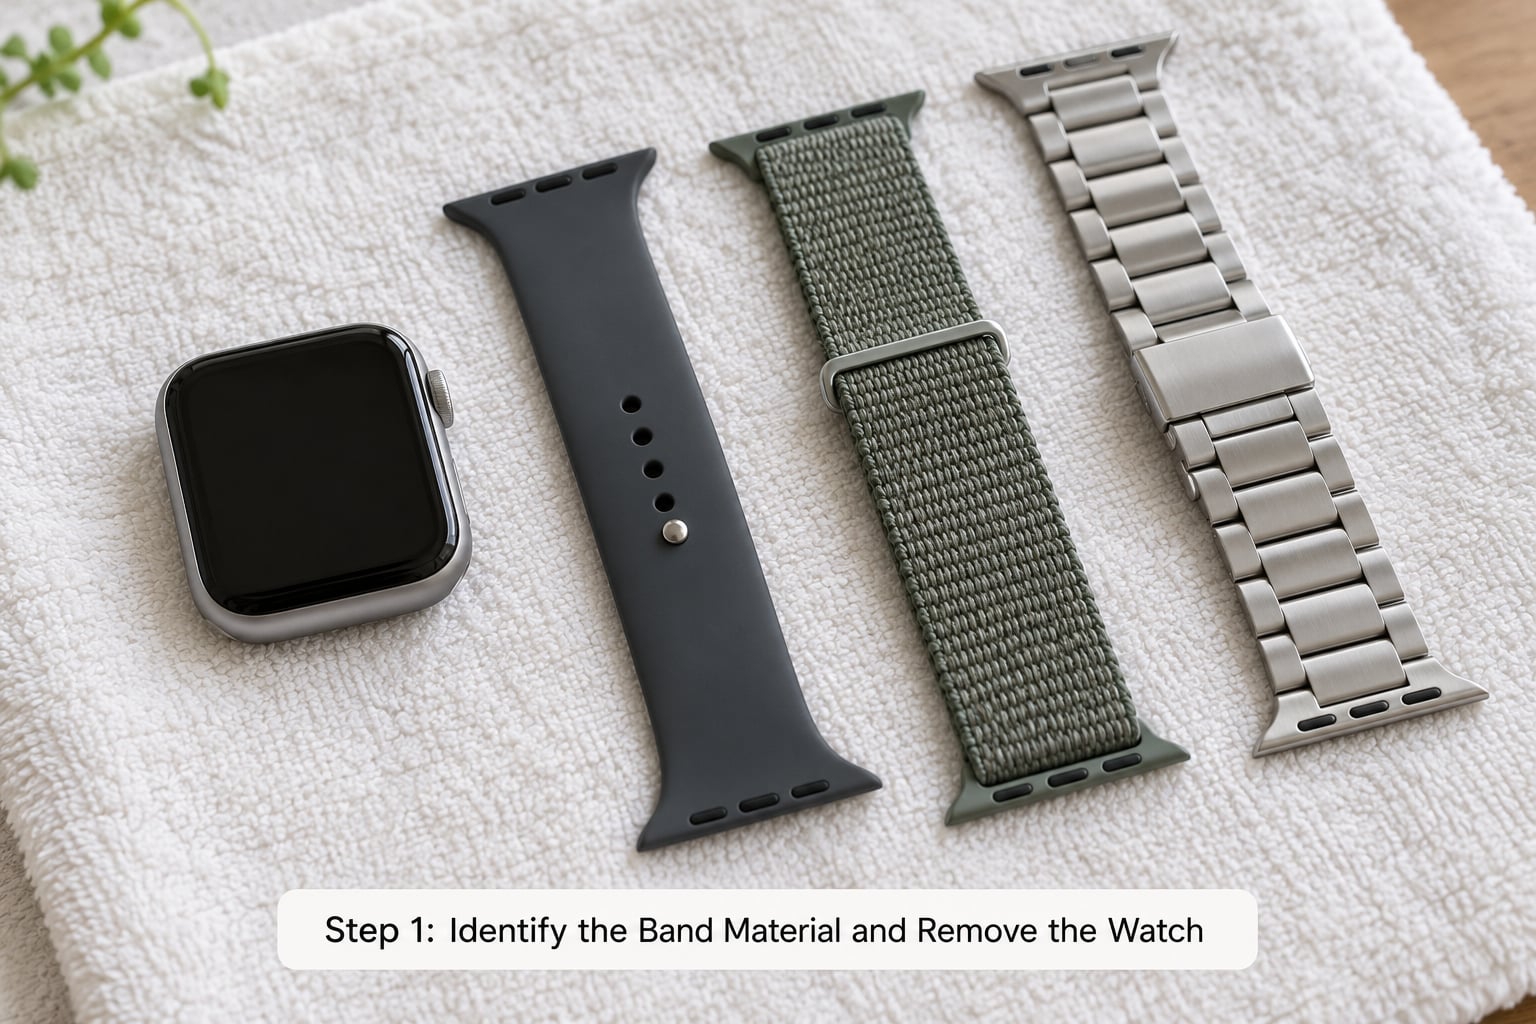
Hold the band up to the light and feel it. Smooth, rubbery and slightly springy is fluoroelastomer, the material Apple uses for the Sport Band and Nike Sport Band. Fine and fibrous is nylon, used for the Solo Loop and Braided Solo Loop. Warm to the touch and creased is leather. Cool, rigid and clicky is stainless steel, whether it is a Milanese Loop or a Link band.
To take the band off, turn the watch over and press the band release button in the groove where the band meets the case. Push it in toward the case and slide the band out. On a Link band you also flip the underside clasp open first, and on a Solo Loop the whole band is a single loop that unhooks from the connector rather than sliding into a buckle.
Push the release with a thumbnail rather than a tool. Forcing it with a screwdriver is the fast route to a bent release spring, and that is a case repair rather than a band repair. If the button feels stuck, the band is usually under tension, so ease the tension by holding the two ends apart while you press.
Step 2: Prepare the Band and Cleaning Solution
Fill the bowl with lukewarm water and add one small drop of mild dish soap. Swirl it until the water is just cloudy, no foam. This is your cleaning solution for silicone, nylon and stainless steel.
For leather, you do not use the bowl. You use a barely damp cloth, meaning you wring it out until you cannot squeeze a drop from it. Leather that gets properly wet can stain, stiffen or crack as it dries, and soap residue left in the grain will keep drawing moisture out of it for months.
Here is the cheat sheet for the whole lineup, so you only have to find your row once:
| Band material | Can it get wet | Soap and water | 70% alcohol safe | Drying time |
|---|---|---|---|---|
| Silicone Sport Band | Yes, briefly | Yes | Yes, spot clean | Air dry, 1 to 2 hours |
| Nylon Solo Loop | Yes, briefly | Yes | Yes, spot clean | Air dry, several hours |
| Braided Solo Loop | Yes, briefly | Yes, gently | Yes, sparingly | Air dry, 6 hours or more |
| Leather bands | No | No, damp cloth only | No | Blot, 4 to 6 hours away from heat |
| Milanese and stainless steel link | Yes | Yes | Yes | Wipe dry, then air dry |
Two notes on that table. Braided Solo Loop takes the longest to dry because the yarn holds water deep in the weave, so it is the one most likely to go back on your wrist damp. And leather gets no alcohol at all, because alcohol strips the finish and dries the hide until it cracks along the fold lines.
Step 3: Clean the Band Gently
For silicone, hold the band under the soapy water and run your thumb along both sides of the strap. The grime sits in the texture and along the edges where the band curves back, and thumb pressure with soap does more than a cloth ever will. Pay attention to the two holes nearest the buckle, which collect grime faster than anywhere else on the band.
For nylon, dip the band in the water and gently squeeze the soapy solution through the weave from one end to the other. Do not wring it and do not scrub hard, since the yarn fibers lift when you abrade them. Push a soft toothbrush through the loops, following the direction of the weave.
For leather, put the damp cloth flat over the band and press down. Lift, move to a clean section, press again. You are removing surface grime, not polishing the leather, and you should never see water beading on the band. If there is a stubborn mark, work the corner of the cloth over it in small circles without pressing hard.
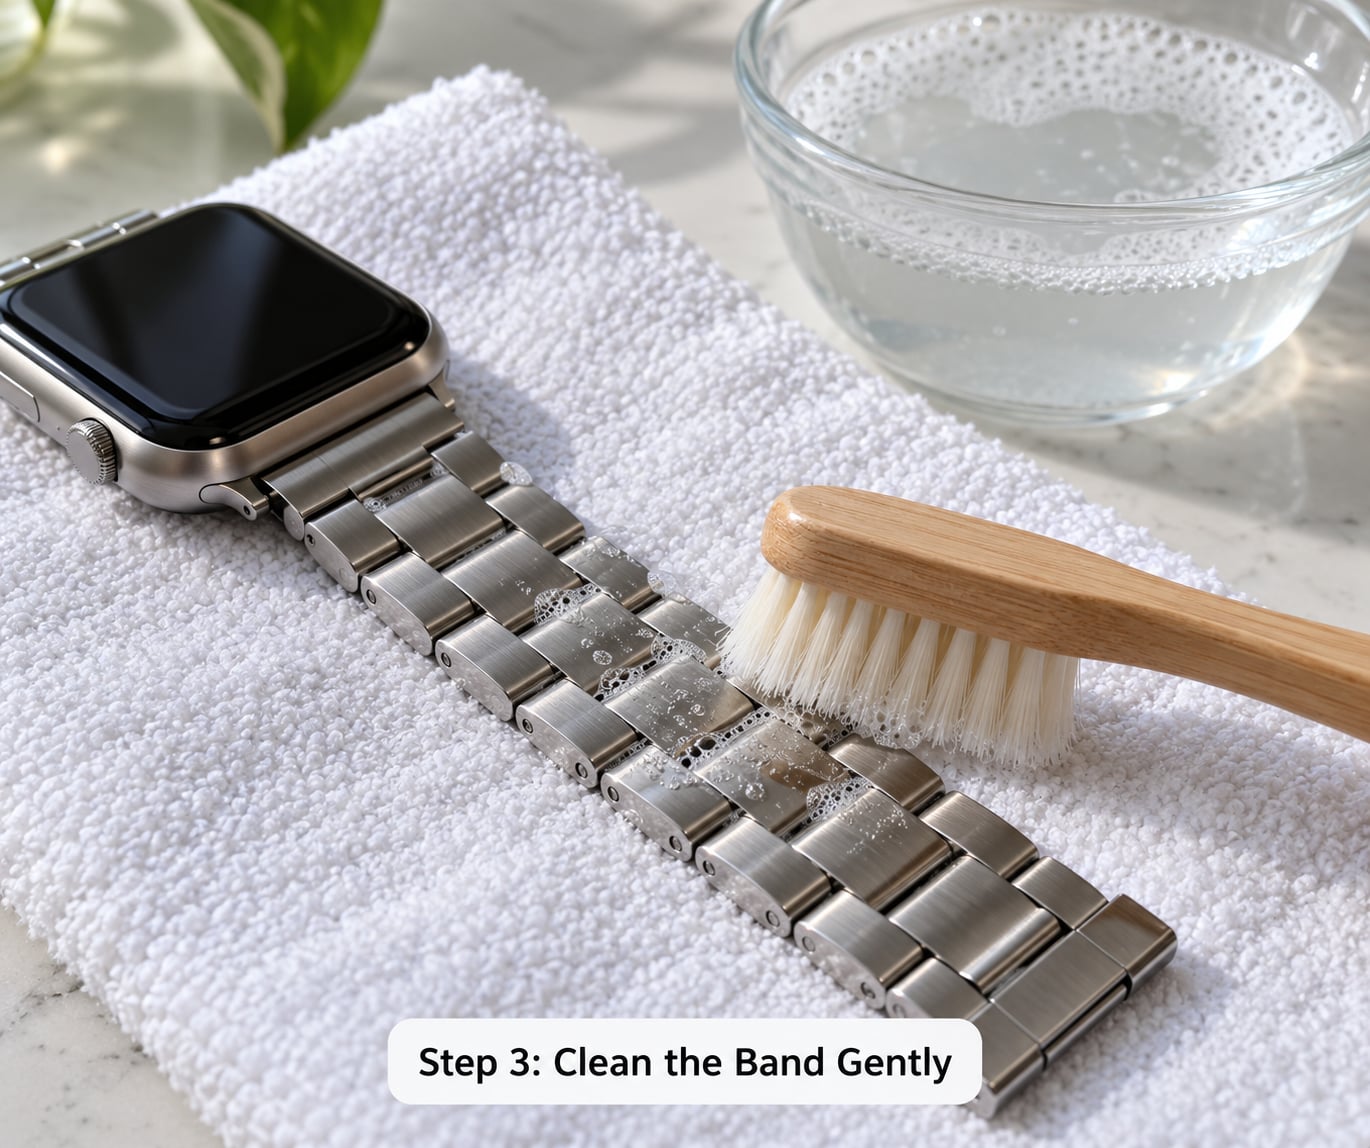
For stainless steel, soak the Milanese Loop or the Link band in the soapy water for a few minutes, then brush along the links with a soft-bristled toothbrush. Debris hides where links meet and under the folding clasp, and that is where the brush earns its place. Rinse, then wipe with a clean section of cloth to keep water spots from drying into the metal.
For any material, the sign that the dirt has gone is simple: the cloth comes away grey or the water in the bowl turns cloudy, and the band looks like the one you took off. A cotton swab gets into the connector slot and around the pin where the band locks into the case, which is the grime you cannot reach any other way.
If you want to disinfect rather than just clean, a cotton swab barely damp with 70% isopropyl alcohol is enough for silicone, nylon and steel. Spot test an inconspicuous spot first, and keep alcohol off the watch body entirely, especially the speaker grille and the band release area.
Step 4: Dry and Check the Band
Rinse silicone and metal under cool running water until the water runs clear, then shake off the excess and lay the band flat on your towel. Pat nylon dry with a towel first rather than leaving all that water in the weave, and set it somewhere with airflow so both sides dry.
Blot leather with a dry cloth and let it air out at room temperature. No hair dryer, no radiator, no sunny windowsill, and no leaving it on the dashboard of a car. Direct heat is what turns clean leather into cracked leather.
Before you put it back on, look at it properly. Check the band holes are open rather than clogged, the clasp and buckle spring back, the pins and spring bars sit tight in the connector, and nothing is discolored or sticky. Run a finger over the leather creases and the silicone edges. If you feel a hardened patch, a rough spot or a hinge that no longer clicks shut, the band has taken damage from cleaning or from wear, and it is a replacement item rather than a cleaning problem.
Never put a damp band back on your wrist. A nylon or braided band can hold moisture against your skin for hours, and that trapped dampness is the same condition that causes odor and rash in the first place.
Step 5: Reattach the Band and Maintain It
Line up the connector pin and slide the band back into the slot until you feel it seat, then press the band release button to lock it. Pull firmly on the band with both hands. If the connection is solid, the band stays put and the release button moves freely; if it feels loose or the button needs force, take it back off and reseat it rather than trusting it with a workout.
For a Link band, close the folding clasp and check that the release lever snaps into the notches. For a Solo Loop, thread the loop back through its connector and confirm the loop is not twisted, because a twisted band slowly works itself loose.
For maintenance, a simple rhythm beats a rare deep clean. Wipe the underside with a dry lint-free cloth every day you wear it. Give it a proper wash after a workout, a swim, a dusty day outdoors, or any time food or sunscreen lands on it. Do the deeper clean of band holes, clasp and connector once a month, and if you notice odor or a rash forming, clean it that day instead of waiting.
Leather needs its own rhythm. A dry, barely damp wipe every couple of weeks keeps it conditioned, and a leather conditioner every three to six months keeps the grain supple. Bands also do better when they are not left damp in a drawer. Rotate two or three bands, and if you store any, dry it fully first and keep a silica gel packet nearby.
Common Mistakes
Most band damage I see comes from a handful of repeatable mistakes, and every one of them has a simple fix.
- Cleaning the band while it is still attached. You cannot rinse a band that is on the watch, and the connector channel traps the water you pour into it. Remove the band first, always.
- Using bleach, ammonia or household sprays. They discolor silicone within one wash and can swell or embrittle the connectors. Mild dish soap does the same job without the risk.
- Soaking leather, or using alcohol on it. Leather that is fully wet will stain unevenly and crack as it dries. Use a barely damp cloth and blot.
- Scrubbing with an abrasive. Magic Eraser, baking soda as a scrub, an eraser or a stiff brush will micro-scratch silicone and nylon, and the damaged surface holds more grime than the original one did. Use a soft-bristled toothbrush and patience.
- Drying with heat. Hair dryers, radiators, car dashboards and hot water speed up drying at the cost of warped connectors, cracked leather and melted finishes. Room temperature and airflow work.
- Wearing a band that is still damp. A wet nylon Solo Loop against warm skin overnight is the single most reliable way to end up with a wrist rash. Give it the full drying time in the table above.
- Cleaning the watch body with liquid. The case is water resistant to a rating, not waterproof, and a band soaking is not a case cleaning. Wipe the case with a dry lint-free cloth; dampen it slightly only if the manufacturer allows it, and keep liquid away from the crown and speaker.
One more that comes up constantly: expecting a ten-year-old band to come back looking new. Bleaching or deep chemicals will not do it, and they permanently shorten the life of the band. Gentle soap and a soft brush remove nearly all of the grime that people try to attack with harsher methods.
Frequently Asked Questions
Can I wash my Apple Watch band under running water?
Most silicone, sport, nylon and stainless steel bands can be rinsed or gently washed with mild soap and water, but remove the band from the watch first and follow that material’s care instructions. The watch case itself is only water resistant to a rating, not waterproof. A Milanese or Link band rinses easily. Leather never goes under a tap, and a braided loop only gets a quick dip.
How often should I clean an Apple Watch band?
Clean the band whenever it collects sweat, dirt, sunscreen, lotion, food residue or noticeable odor. A weekly wipe is useful for routine maintenance, while exercise, swimming, outdoor work or summer heat each call for a rinse that day. Do the deeper clean of band holes, clasp and connector about once a month, and always clean before wearing a band that has been stored damp.
Can I use alcohol wipes or bleach on an Apple Watch band?
Avoid bleach, alcohol, ammonia, harsh disinfectants and strong household cleaners, because they can discolor, harden or weaken adhesives and finishes. Use mild dish soap and water for water-resistant materials, and keep 70% isopropyl alcohol for spot disinfecting on silicone, nylon and stainless steel only, applied with a barely damp cotton swab. Leather gets neither.
How do I get odor out of an Apple Watch band?
For silicone and sport bands, wash gently with mild dish soap, rinse thoroughly, and let the band air-dry completely away from direct heat. For leather, blot the area rather than scrubbing and allow it to air out for several hours. Wiping the band and your wrist with a lint-free cloth after a workout stops most odor before it sets in, and leaving a damp band worn overnight is what usually causes it in the first place.
Can I clean the Apple Watch itself with soap and water?
Treat the band and the case as two separate jobs. The band is the part that can be washed, because it is removed first. The case is wiped with a soft, lint-free, nonabrasive cloth, lightly dampened with fresh water if the manufacturer permits it, and never soaked or run under a tap. Keep all liquid out of the crown, the speaker grille and the band release area.
What should I do if a band irritates my skin or looks damaged?
Stop wearing the band and clean it, then let the skin settle before trying again, since most rashes come from trapped sweat and grime rather than the material itself. Tighten or loosen the fit so the band is not compressing your wrist. If the band shows cracks, sticky patches, a hinge that will not click or clogged holes, replace it rather than cleaning harder, and see a doctor if irritation persists.
How to Clean Apple Watch Band Safely: Start With the Material
Start by identifying what the band is made of, because everything after that follows from it. Silicone, nylon and stainless steel can take mild soap, lukewarm water and a soft brush. Leather takes a barely damp cloth and nothing more.
Then pull the band off the watch before you wet anything, clean it gently, and give it its full drying time on a towel. No bleach, no abrasive erasers, no heat, and no wearing it damp.
If a band has already cracked, discolored or stopped clicking shut, cleaning will not bring it back, and Apple or an authorized service provider can tell you whether a replacement is the better call. For a rash that does not settle after a week with a clean, dry band, see a doctor.